Hello Guys ! Welcome back to Techy DarshaN. Today Our Tutorial is How To Add Auto Cool Emoji Reaction Widget In Blogger.
What is Emoji Reaction Widget ?
The Emoji Reaction Widget is a key feature used to Rate every post you post on our website.
This Emoji Reaction Widget will be added automatically in all posts in your website and it is very Attractive
What is Emoji Reaction Widget Uses ?
Emoji Reaction Widget give your guests a fun, speedy method for associating with your substance. The best part is that they look incredible on each gadget and are easy to design and introduce. In Some sites or sites, you've seen like - Love, Like, LOL, WOW, Sad and Angry. With only a couple of straightforward snaps, you can introduce Emoji Reaction Widget on your site. You can also track your post by knowing how much people liked your post by their reactions. Just follow all steps and it is very easy not much complicated.
Let's Begin !
How To Add Auto Cool Emoji Reaction Widget In Blogger ?
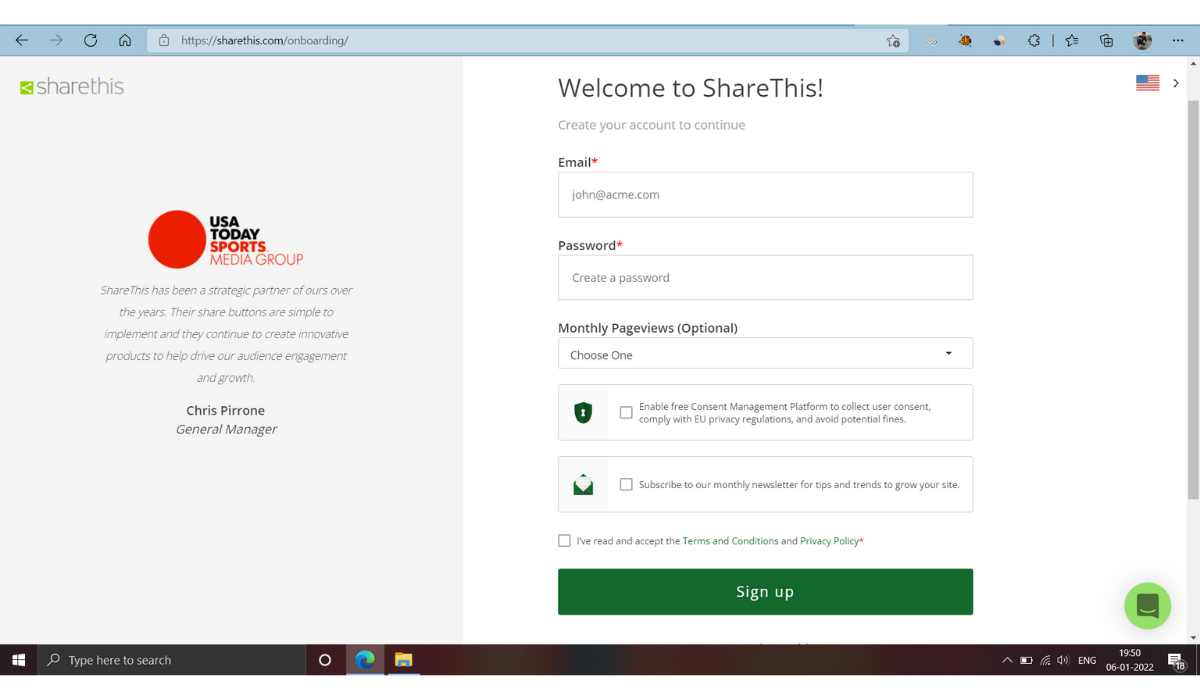
Step 1 : So in this tutorial we are using a free platform ShareThis to make this Emoji Reactions so please go and signup there
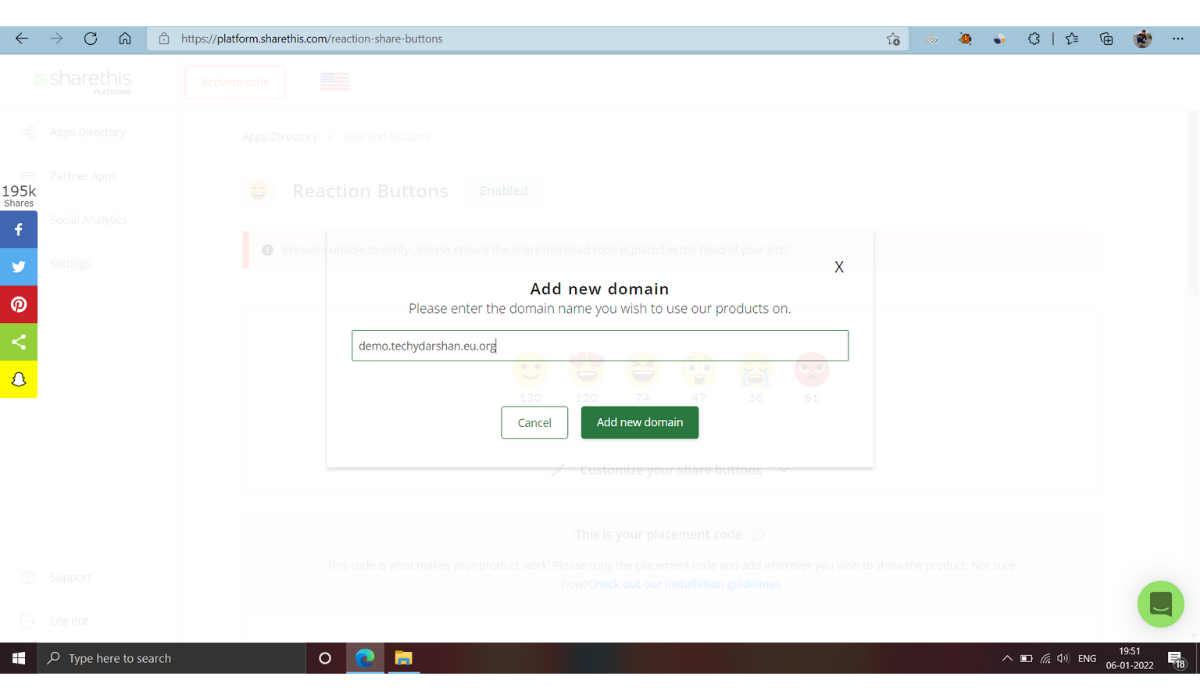
Step 2 : After creating a new account in ShareThis , Will be asked to add a domain, add your website's Domain name without any https://www. as shown in below picture
Step 3 : After adding your domain, scroll down you'll find Reaction Buttons
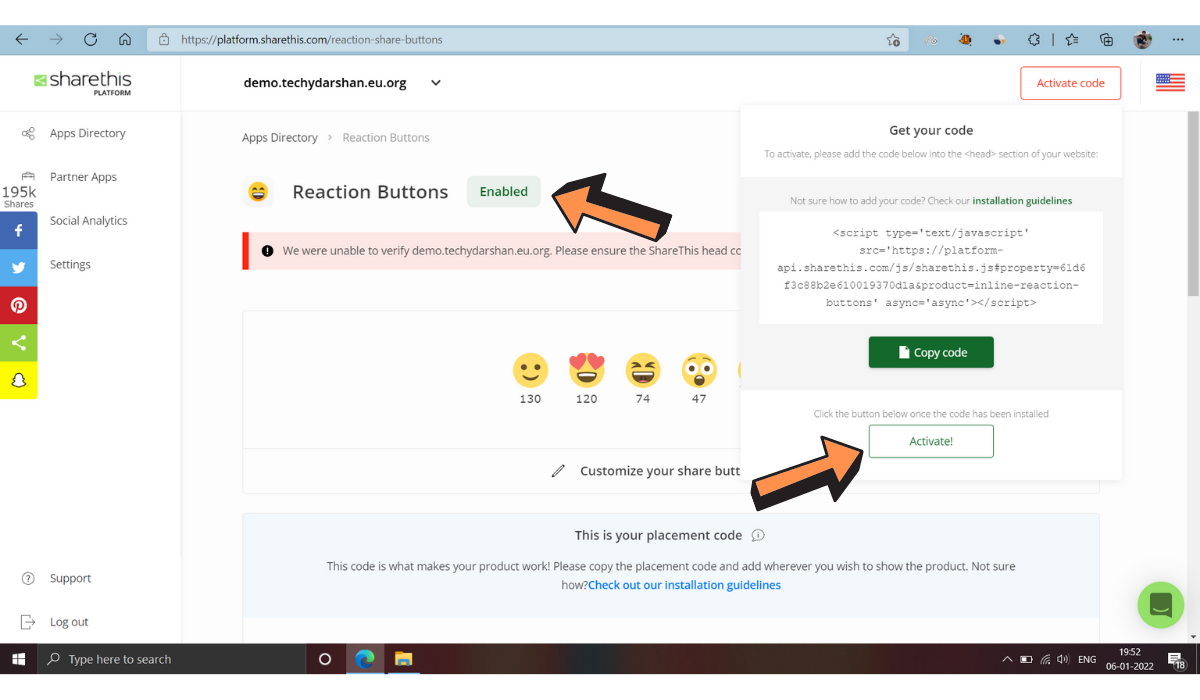
Step 4 : Click on it and make sure to Enable the Tool
Step 5 : Click on Activate Code on the top right corner and copy the code given
Step 6 : And make sure to paste the given code in Theme's <Head> Section and then click on Activate Code
Make sure replace & with & else you may face error in Activation Code
Step 7 : After activating the code your Site will will be connected
Step 8 : Scroll down you'll find and Emoji reaction buttons and you can also customize the position of the buttons according to you and update it .
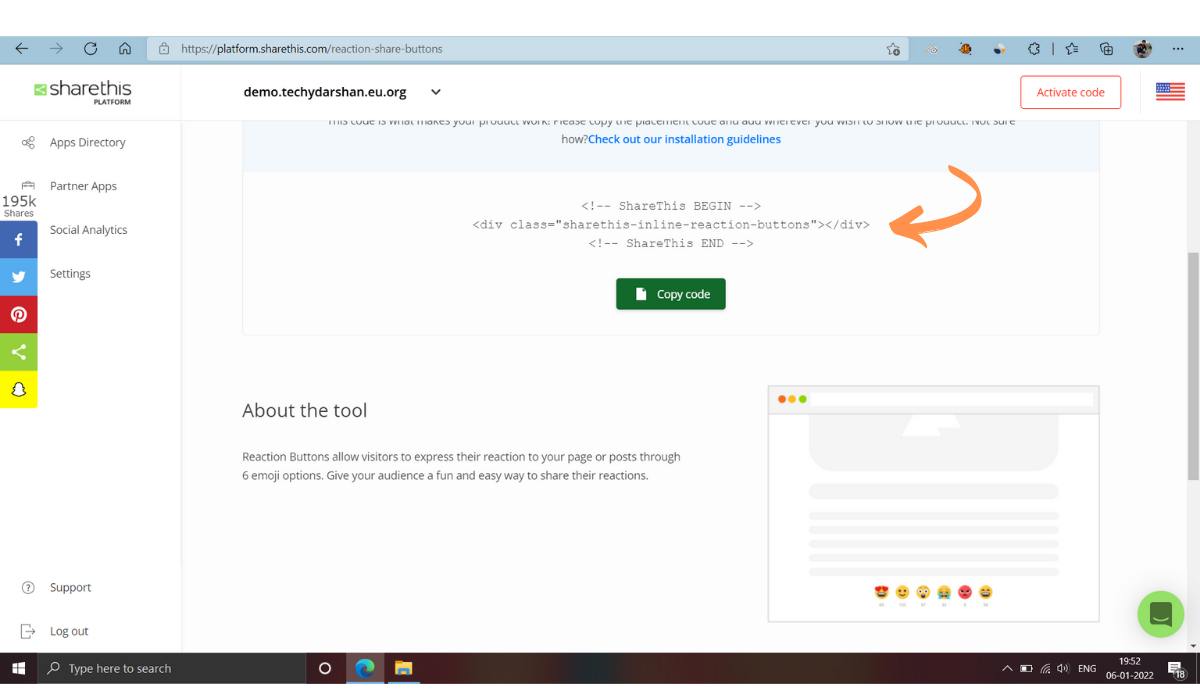
Step 9 : Copy the reaction button codes and go to your Theme > Edit HTML
Step 10 : Search for <data:post.body/>
and paste the Reaction Button code just after it. This <data:post.body/>
May appear 3 times in your theme, paste the reaction button code in the most recent one or the 3rd One.Congrats ! You Have Finally Added Cool Emoji Reaction Widget In Blogger Site.
Conclusion :
In this post I made tutorial on How To Add Auto Cool Emoji Reaction Widget In Blogger and tried to provide step-by-guide by the way it is very easy to add it if follow all the steps carefully. I hope you have liked it.
If you have any questions or face any problem please ask through the comments section or join our Telegram Group for Discussion.


